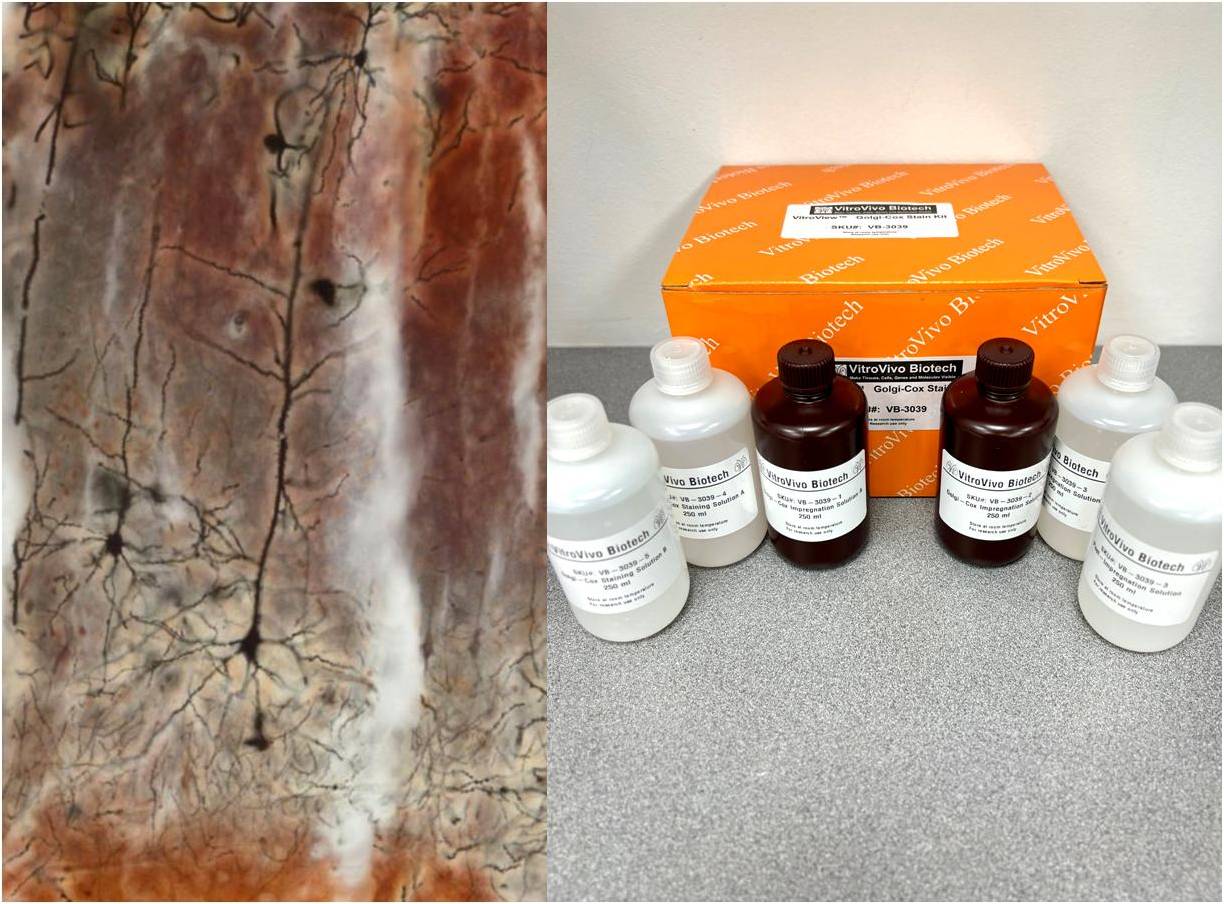
Description
Golgi-Cox Staining is a modern adaptation of the classic Golgi staining technique. It selectively labels a small, random subset of neurons and glial cells within nervous tissue, enabling detailed visualization of complete neuronal morphology—including the soma, dendrites, axons, and dendritic spines—against a clear, unstained background.
This method is an essential tool in neuroanatomical research for studying brain structure, development, neural plasticity, and disease-related changes in neuronal morphology.
Principle of Golgi-Cox Staining
Golgi-Cox staining is based on a two-step chemical process involving:
- Impregnation
Neural tissue is incubated in a solution containing potassium dichromate, potassium chromate, and mercuric chloride. Over time, a reduction reaction causes the formation of calomel (light-grey mercurous chloride precipitate) in a small number of neurons and glial cells. - Color Development
After sectioning, tissue is briefly exposed to ammonium hydroxide. This triggers a disproportionation reaction, converting calomel into black metallic mercury, creating permanent, high-contrast staining of the cells. - Fixing and Mounting
A photographic fixer is used to clear residual salts before mounting for microscopy.
Applications
- Neuronal Morphology
Enables high-resolution visualization of the complete dendritic and axonal arbor of individual neurons, often not possible with other staining methods. - Dendritic Spine Analysis
Ideal for studying fine dendritic structures—spine density, shape, and distribution—which are linked to synaptic activity, learning, and memory. - Disease Research
Detects morphological changes in neurons in models of neurodegenerative and neurodevelopmental disorders (e.g., Alzheimer’s, Huntington’s disease). - Neuroplasticity Studies
Evaluates structural changes in neurons in response to environmental, pharmacological, or genetic interventions.
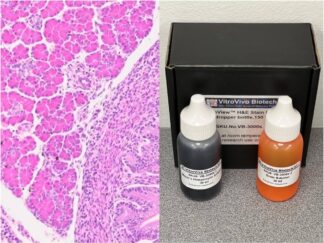
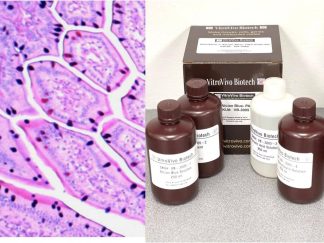
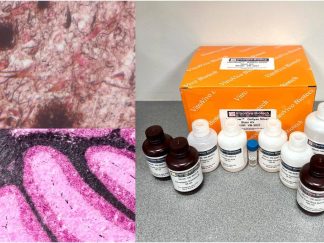
Kit Components
| VB-3039-1 | Golgi –Cox Impregnation Solution A | 250 ml |
| VB-3039-2 | Golgi –Cox Impregnation Solution B | 250 ml |
| VB-3039-3 | Post-Impregnation Solution | 250 mlx2 |
| VB-3039-4 | Golgi-Cox Staining Solution A | 250 ml |
| VB-3039-5 | Golgi-Cox Staining Solution B | 250 ml |
Materials Required but Not Included
- Ultrapure water
- VitroView™ Gelatin-coated Microscope Slides (VB-Gelatinslides)
- Plastic forceps
- Embedding Cassettes
- 60mm Detri Dish
- Fine Brush
- Coverslips
- Staining jars
- Ethanol
- Xylene
- Xylene-based resinous mount medium
- Cryostat
- Upright bright-field microscope
Storage
- Store the kit at room temperature.
- The shelf life is 2–3 months from the date of receipt.
Protocol
1. Preparation of Impregnation Working Solution
It is recommended to use new containers for the impregnation solution. Avoid contact between the solution and metal items, such as forceps.
1.1 Mix equal volumes of Golgi –Cox Impregnation Solution A (VB-3039-1) and Golgi –Cox Impregnation Solution B (VB-3039-2) in a new glass or plastic container. Keep tightly sealed.
1.2 Do not stir the mixture. Let stand at room temperature in the dark (e.g., wrapped in aluminum foil) for at least 24 hours before use.
1.3 Use the precipitate-free supernatant for tissue impregnation.
2. Tissue Preparation
2.1 Anesthetize the animal using a lethal dose, and confirm deep anesthesia (e.g., no response to foot pinch).
2.2 Do not perfuse with buffer or fixative. Rapidly dissect brain or spinal cord. Cut into 5~10 mm thick blocks.
2.3 Rinse tissue briefly (2–3 sec) in double distilled water to remove surface blood.
3. Tissue Impregnation
3.1 Aliquot the impregnation working solution that prepared in the section 1.1 in a 5mL sterile tube with screw cap that provided by kit.
3.2 Using plastic forceps provided in the kit, transfer the tissue to the tube, tighten the tube cap, and store it at room temperature in the dark.
NOTE: The solution volume should be at least five times the tissue volume. For example, use 5mL or more of impregnation solution for 1 cm³ of tissue.
3.3 After 12–24 hours, replace new working impregnation solution with the help of embedding cassettes that provided in the kit to remove the old impregnation solution.
3.4 Continue impregnation for 2 weeks at room temperature in the dark. (Do not recommend more than the impregnation two weeks to avoid non-specific staining).
3.5 Using plastic forceps, transfer the tissue into a new 5mL sterile tube containing Post-Impregnation Solution aliquoted from VB-3039-3.
NOTE: Use at least 5× the tissue volume of solution for each sample, and store at 4 °C in the dark.
3.6 Replace new Post-Impregnation solution after 12 hours. Continue incubation for 24–72 hours at 4 °C.
4. Tissue Freezing and Sectioning
4.1 Chill 300–500 ml isopentane in a metal container placed in dry ice until it reaches –70 °C (15–30 min).
4.2 Remove the tissue from post impregnation solution to place it on a mesh basket to maintain shape. Carefully immerse the tissue in cold isopentane for 0.5-1 minute (Optimize time to ensure complete freezing without cracking).
4.3 Remove the tissue, blot with absorbent paper, and store it at-70 °C, wrapped in aluminum foil and Parafilm until cryostat sectioning.
4.4 Set the cryostat temperature to −19 °C, and transfer the tissue from storage at −70 °C to the cryostat chamber for approximately 2 hours to allow the tissue to warm to −19 to −20 °C for sectioning.
4.5 Place tissue on chuck and cover with a thin layer of embedding matrix and section tissue at 80–200 µm thickness as needed.
4.6 Transfer the section using fine brush provided in the kit to Post-Impregnation Solution (VB-3039-3) in Petri dish provided in the kit.
4.7 Mount the section to gelatin-coated slides and blot excess solution with filter paper.
4.8 Air-dry overnight at room temperature in the dark.
NOTE: Use sections promptly or store at room temperature for up to 3 days in the dark.
5. Slide Staining and dehydration
5.1 Prepare staining solution in a 25mL staining jar and rinse slides in distilled water, 2 times for 3 minutes each.
5.2 Prepare staining solution as following: 2ml Golgi-Cox Staining Solution A (VB-3039-4) and 2ml Golgi-Cox Staining Solution B (VB-3039-5) in 16ml ultrapure water.
5.3 Immerse slides in solution, close the jar tightly, and incubate for 10 minutes.
5.4 Rinse slides in distilled water 2 times for 4 minutes
5.5 Dehydrate slides: 50%, 75%, 95% ethanol, 5 min each and 100% ethanol, 3 changes, 5 min each
5.6 Clear in xylene, 2 changes, 5 min each.
5.7 Mount with xylene-based resinous medium and coverslip.
5.8 Allow to dry. Examine using bright field microscopy.
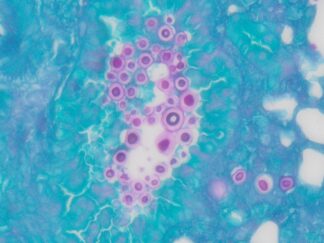
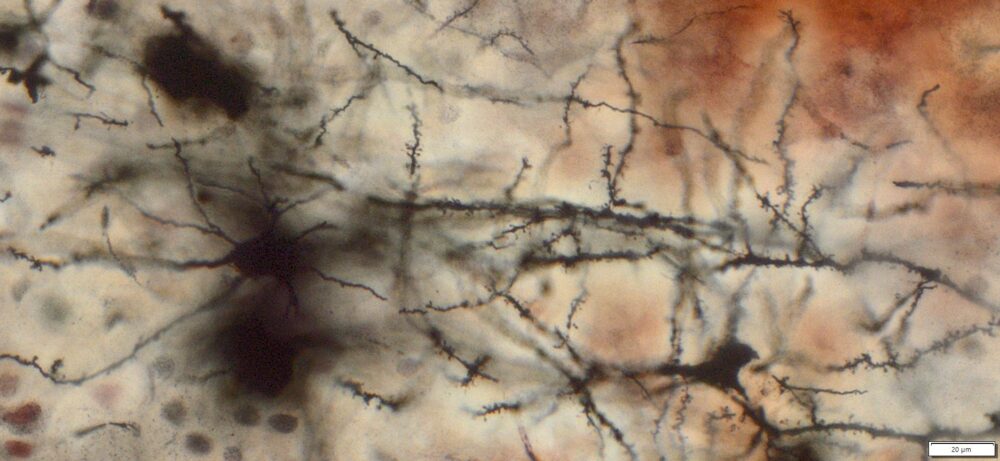
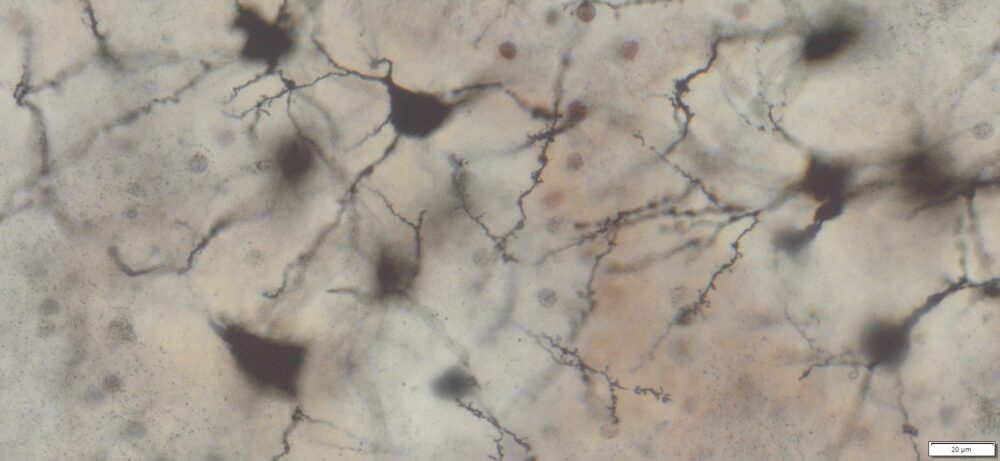
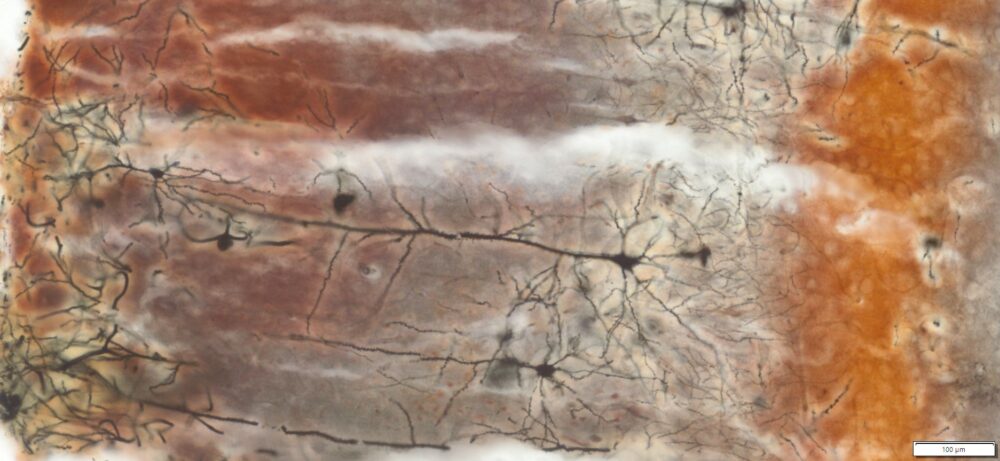
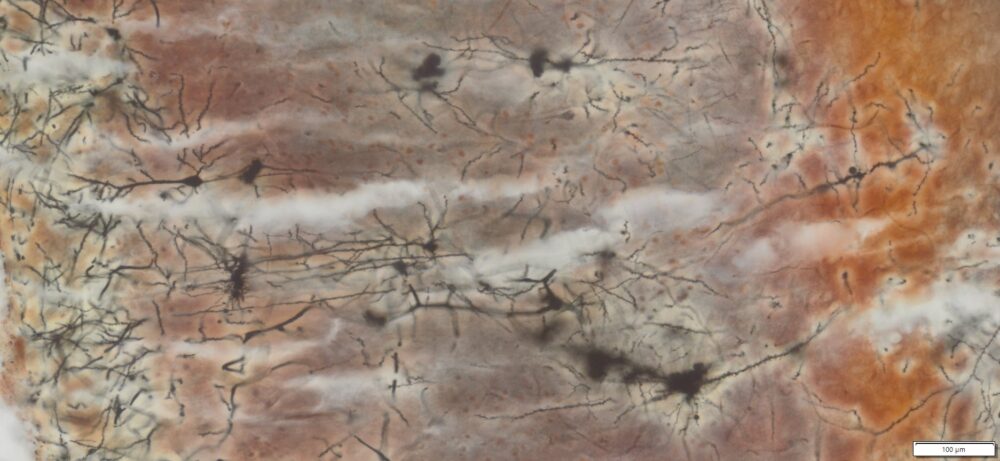
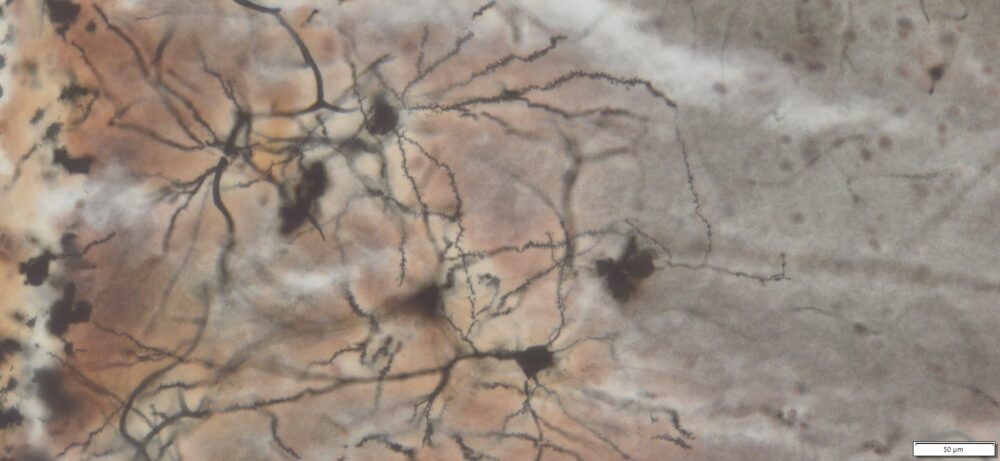
Expected Neuronal Visualization
-
Sparse labeling of a random subset of neurons and glial cells.
-
Complete morphology of labeled neurons:
-
Soma (cell body) clearly defined.
-
Dendritic trees visualized in fine detail, often extending long distances.
-
Axons visible, though often thinner and more difficult to trace than dendrites.
-
Dendritic spines (small protrusions on dendrites) can be seen, enabling analysis of synaptic structures.
-
More Images

References
- Zhong F, et al.(2019) Step by Step Golgi-Cox Staining for Cryosection. Front. Neuroanat. 13:62. doi: 10.3389/fnana.2019.00062
- Vints K, et al. (2019) Modernization of Golgi staining techniques for high-resolution, 3-dimensional imaging of individual neurons. Sceintific Reports. 9:130/DOI:10.1038/s41598-018-37377-x
- Friedland DR, et al. (2006)A modified Golgi staining protocol for use in the human brain stem and cerebellum. Journal of Neuroscience Methods. 150: 90–95
User Manual and Material Safety Data Sheet (MSDS) (PDF)
Disclaimer
- This user manual is intended to serve as a general guideline. Users should tailor the procedures to their specific experimental needs, sample types, and equipment specifications.
- The VitroView™ Golgi-Cox Stain Kit is intended for in vitro research use only. It is not suitable for clinical diagnostic procedures.
- This kit contains reagents that are toxic and hazardous if inhaled, ingested, or upon contact with skin. Do not pipette by mouth. Avoid inhalation and direct contact with skin or eyes. In case of skin or eye contact, rinse immediately with copious amounts of water and seek medical advice. If ingested, rinse the mouth thoroughly with water and contact a physician immediately. Material safety data sheet (MSDS) is available at vitrovivo.com
- All procedures should be conducted under a certified chemical fume hood.
- Wear appropriate personal protective equipment (PPE), including a lab coat, gloves, and eye/face protection, when handling reagents.
- Always wash hands thoroughly after completing the experiment.